Linux 进程状态之 D
题记:
研究啥问题,至少要能重现啥问题
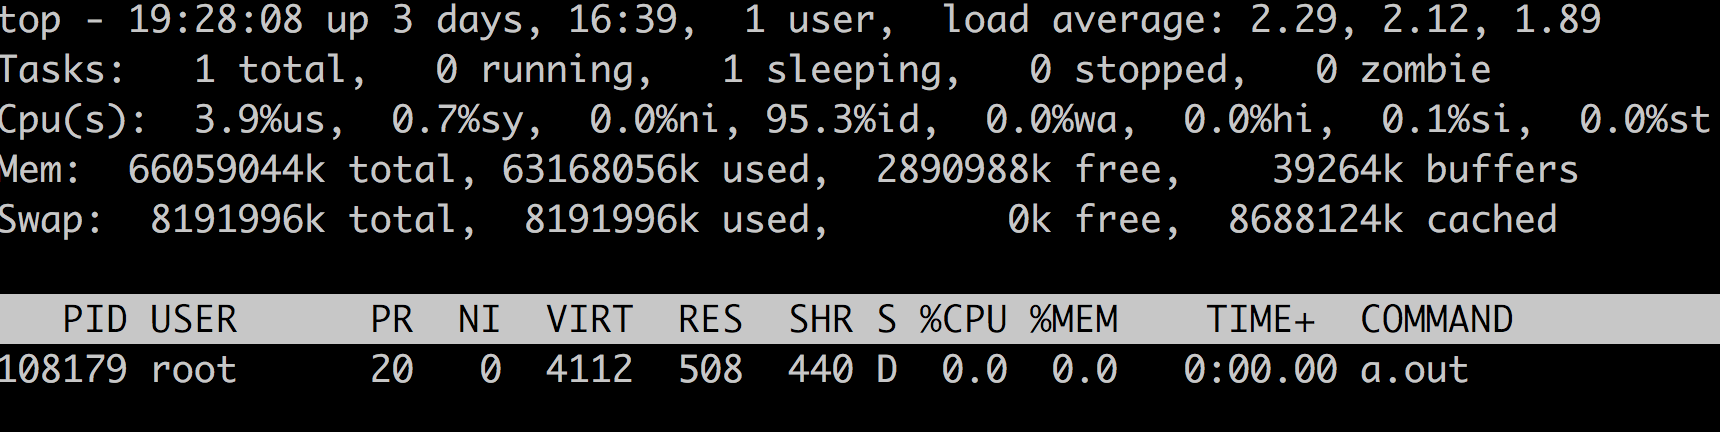
如何制造一个状态为D的进程呢?
如下:
|
1 2 3 4 5 |
#include <sys/types.h> #include <unistd.h> void main() { if (!vfork()) sleep(100); } |
主机内存查看方式
我们的一个96G内存的机器:

阿里云的一个4G内存的机器:

难道阿里云给的不够?
提工单给阿里云,人家说内存查看方式不对,应该是:
|
1 |
dmidecode | grep -A 5 "Memory Device" | grep Size | grep -v Range |
工单截屏:

甭说,还真是,如下:

那么,free看不到的那部分内存谁用了去了?
Docker一些知识
- docker容器其实(可以)在同一个父的cgroup下的,可以对这个父的cgroup进行限制,避免总量超限
- 一个机器上可以有多个docker daemon的,截止该文章诞生的时候,该功能还处于试验阶段,至少理论上是可以的: 参考: https://docs.docker.com/engine/reference/commandline/dockerd/#/running-multiple-daemons
- docker daemon可以使用不同的运行时,默认为containnerd,自动启动,并且通过socket通信;· 参考: https://docs.docker.com/engine/reference/commandline/dockerd/#/docker-runtime-execution-options
Docker daemon.json
Docker daemon 启动的时候可以有很多的命令行选项,这些选项也可以写到一个配置文件中,默认位置: /etc/docker/daemon.json ,key、value都和命令行一一对应,基本一样,但就是有些key在daemon.json中是复数形式,如: insecure-registries、storage-opts
|
1 2 3 4 5 6 |
{ "live-restore": true, "insecure-registries": ["docker-registry.i.bbtfax.com:5000"], "graph":"/data3/docker", "storage-opts":["dm.basesize=50G", "dm.loopdatasize=600G"] } |
docker-1.12 中 dm.basesize 默认10G, docker-1.9.11中默认 100G
storage-opts相关配置: https://docs.docker.com/engine/reference/commandline/dockerd/#/storage-driver-options
dm.fs 容器文件系统类型,目前支持ext4和xfs, 默认xfs
dm.loopdatasize 修改配置后,重启生效,只能改大,不能改小
dm.basesize 每次启动daemon都参考,一旦设置,无法修改,除非把daemon数据都删除重来;如果已经创建了容器了,不管该容器是死了、还是活着的、还是已删除,dm.basesize 都不能修改
有一些docker配置选项可以在不重启daemon的时候修改并生效,直接kill -HUP PID_OF_DAEMON 就可以,这种配置不多:
The list of currently supported options that can be reconfigured is this:
debug: it changes the daemon to debug mode when set to true.cluster-store: it reloads the discovery store with the new address.cluster-store-opts: it uses the new options to reload the discovery store.cluster-advertise: it modifies the address advertised after reloading.labels: it replaces the daemon labels with a new set of labels.live-restore: Enables keeping containers alive during daemon downtime.max-concurrent-downloads: it updates the max concurrent downloads for each pull.max-concurrent-uploads: it updates the max concurrent uploads for each push.default-runtime: it updates the runtime to be used if not is specified at container creation. It defaults to “default” which is the runtime shipped with the official docker packages.runtimes: it updates the list of available OCI runtimes that can be used to run containers
有些配置重启daemon都不能生效
参考: https://docs.docker.com/engine/reference/commandline/dockerd/#/configuration-reloading
关于wordpress的升级
曾经,我的博客是放在国外的,用过bluehost,用过hostmonster,这两家几乎是一样的。
由于放在国外访问起来不太方便,自己访问都慢,后来忍无可忍,才迁到了国内,当时正在研究docker,为了再次迁移方便,就直接装到了docker里面,这样,迁移的时候只需要迁移容器,省得重新安装了。
但凡“变化”总是会出现一些问题的:
首先,wordpress的升级是非常方便的,点几下鼠标就能轻松搞定,虽说提示升级前要备份,我从来没备份过,总是瞬间就完成了升级; 但是,迁移之后,这种方便的升级没有了,一直很忙,没工夫折腾。终于到现在,忍无可忍,研究了一下,发现wordpress的升级(包括插件的安装和卸载)靠的是博客所在主机提供的ftp服务(我不喜欢这种做法),曾经在bluehost和hostmonster的时候,ftp总是开着的;然而,使用docker之后,我没有开启ftp服务;升级就无法进行。于是,在docker中安装了vsftpd(升级的时候使用,升级完了就关掉),依然不行,猜测是ftp用户的权限的问题,添加权限后,升级便恢复到了曾经的方便。
其二,当今时代,各大网站都在使用https,刚好有些证书提供商可以免费提供https证书,而且自己对http2.0也颇感兴趣,于是,给自己博客添加了https证书,同时开启了http2.0;一切都还算顺利,只是开启https后,网页中一些静态资源(文章中的图片)是写死了http,于是浏览器中就不会出现绿色的锁,这个好办,直接在数据库中批量替换即可(话说替换的时候,由于连接数据库的编码没有指定,导致把数据写坏了,还好我有备份);
其三, 后来无意间发现,自己博客编辑器中本来是可以直接paste那些qq截图的,现在直接ctrl-v不好使了; 这是我非常喜欢的功能,没有这个就太不方便了,该功能是通过插件image paste实现的,重新安装该插件,依然不好使;只好祭出开发调试手段了,首先打开浏览器的“开发者工具”,看看有没有加载失败的资源或者报错的js语句;果然,image paste插件的js文件加载失败,问题比较明显,该文件试图通过http加载,但是chrome是可以容忍https的页面中使用http的图片资源,也禁止使用http的js资源,所以就直接block了;
为什么那么多资源都能很好地通过https加载,偏偏这一个资源非要走http呢?其实不是该插件的过,wordpress管理后台要求配置“站点地址”,这里面是最初配置的http地址,改为https就好了
systemd工具
systemd-cgls
systemd-cgtop
图形化sar
linux下的sar很强大,但是是命令行的,尤其是一大堆数据看趋势的时候,非常不直观,其实有人已经都想过来,看这里: http://sargraph.com/
docker资源限制之IO
原理:
通过cgroup限制,相关cgroup项如下:
|
1 2 3 4 5 6 7 8 9 10 11 12 13 14 15 16 17 18 19 20 21 22 23 24 25 26 27 28 29 30 31 32 |
-r--r--r-- 1 root root 0 9月 8 19:03 blkio.io_merged -r--r--r-- 1 root root 0 9月 8 19:03 blkio.io_merged_recursive -r--r--r-- 1 root root 0 9月 8 19:03 blkio.io_queued -r--r--r-- 1 root root 0 9月 8 19:03 blkio.io_queued_recursive -r--r--r-- 1 root root 0 9月 8 19:03 blkio.io_service_bytes -r--r--r-- 1 root root 0 9月 8 19:03 blkio.io_service_bytes_recursive -r--r--r-- 1 root root 0 9月 8 19:03 blkio.io_serviced -r--r--r-- 1 root root 0 9月 8 19:03 blkio.io_serviced_recursive -r--r--r-- 1 root root 0 9月 8 19:03 blkio.io_service_time -r--r--r-- 1 root root 0 9月 8 19:03 blkio.io_service_time_recursive -r--r--r-- 1 root root 0 9月 8 19:03 blkio.io_wait_time -r--r--r-- 1 root root 0 9月 8 19:03 blkio.io_wait_time_recursive -rw-r--r-- 1 root root 0 9月 8 19:03 blkio.leaf_weight -rw-r--r-- 1 root root 0 9月 8 19:03 blkio.leaf_weight_device --w------- 1 root root 0 9月 8 19:03 blkio.reset_stats -r--r--r-- 1 root root 0 9月 8 19:03 blkio.sectors -r--r--r-- 1 root root 0 9月 8 19:03 blkio.sectors_recursive -r--r--r-- 1 root root 0 9月 8 19:03 blkio.throttle.io_service_bytes -r--r--r-- 1 root root 0 9月 8 19:03 blkio.throttle.io_serviced -rw-r--r-- 1 root root 0 9月 8 19:03 blkio.throttle.read_bps_device -rw-r--r-- 1 root root 0 9月 8 19:03 blkio.throttle.read_iops_device -rw-r--r-- 1 root root 0 9月 8 19:28 blkio.throttle.write_bps_device -rw-r--r-- 1 root root 0 9月 8 19:03 blkio.throttle.write_iops_device -r--r--r-- 1 root root 0 9月 8 19:03 blkio.time -r--r--r-- 1 root root 0 9月 8 19:03 blkio.time_recursive -rw-r--r-- 1 root root 0 9月 8 19:03 blkio.weight -rw-r--r-- 1 root root 0 9月 8 19:03 blkio.weight_device -rw-r--r-- 1 root root 0 9月 8 19:03 cgroup.clone_children --w--w--w- 1 root root 0 9月 8 19:03 cgroup.event_control -rw-r--r-- 1 root root 0 9月 8 19:28 cgroup.procs -rw-r--r-- 1 root root 0 9月 8 19:03 notify_on_release -rw-r--r-- 1 root root 0 9月 8 19:03 tasks |
这里暂且只讨论:
- blkio.throttle.read_bps_device
- blkio.throttle.read_iops_device
- blkio.throttle.write_bps_device
- blkio.throttle.write_iops_device
较旧的docker版本不支持设置这些,但是,只要你的内核支持上面这些,就可以直接修改cgroup实现。
我这里使用的是devicemapper,宿主机只有一个设备/dev/sda ,如下:
|
1 2 3 4 5 6 7 |
# ll /dev/sda* brw-rw---- 1 root disk 8, 0 7月 11 13:43 /dev/sda brw-rw---- 1 root disk 8, 1 7月 11 13:43 /dev/sda1 brw-rw---- 1 root disk 8, 2 7月 11 13:43 /dev/sda2 brw-rw---- 1 root disk 8, 3 7月 11 13:43 /dev/sda3 brw-rw---- 1 root disk 8, 4 7月 11 13:43 /dev/sda4 brw-rw---- 1 root disk 8, 5 7月 11 13:43 /dev/sda5 |
devicemapper信息如下:
|
1 2 3 4 5 |
# ll /dev/mapper/ 总用量 0 crw------- 1 root root 10, 236 7月 11 13:43 control lrwxrwxrwx 1 root root 7 9月 8 19:03 docker-8:3-1075755737-eb519f8a4930573e982fe8df6c62e1732fb295fca0fe64494157dccef4b52653 -> ../dm-1 lrwxrwxrwx 1 root root 7 8月 24 12:24 docker-8:3-1075755737-pool -> ../dm-0 |
|
1 2 3 |
# ll /dev/dm-* brw-rw---- 1 root disk 253, 0 8月 24 12:24 /dev/dm-0 brw-rw---- 1 root disk 253, 1 9月 8 19:03 /dev/dm-1 |
从上面可以看出:
- docker 使用的mapper-pool为 /dev/dm-0,设备号: 253,0
- 该机器上一个容器,该容器挂载的设备为 /dev/dm-1 , 设备号: 253,1
- 物理磁盘 /dev/sda 设备号: 8,0
容器不仅用到了devicemapper(这里是 /dev/dm-1),而且还挂载了外部的磁盘,下面是关于容器限速100mb的写法:
|
1 2 3 4 5 6 |
#cd /sys/fs/cgroup/blkio/system.slice/docker-eb519f8a4930573e982fe8df6c62e1732fb295fca0fe64494157dccef4b52653.scope #echo "8:0 102400000" >blkio.throttle.write_bps_device #echo "253:1 102400000" >blkio.throttle.write_bps_device # cat blkio.throttle.write_bps_device 8:0 102400000 253:1 10240000 |
关于读速度,这里先不举例了,还有iops都如法炮制
docker 文件系统问题
|
1 2 3 4 5 6 7 8 9 10 11 |
[root@bs2 ~]# top top - 18:08:43 up 149 days, 6:41, 4 users, load average: 396.86, 356.44, 250.94 Tasks: 2776 total, 2 running, 2764 sleeping, 1 stopped, 9 zombie %Cpu(s): 0.8 us, 3.8 sy, 0.0 ni, 6.3 id, 89.1 wa, 0.0 hi, 0.1 si, 0.0 st KiB Mem : 66059044 total, 629988 free, 53493632 used, 11935424 buff/cache KiB Swap: 8191996 total, 0 free, 8191996 used. 7737832 avail Mem PID USER PR NI VIRT RES SHR S %CPU %MEM TIME+ COMMAND 45674 root 20 0 0 0 0 R 99.7 0.0 5:18.03 kworker/u289:6 18863 root 20 0 3459280 256908 5816 S 22.7 0.4 6902:42 cadvisor |
|
1 2 3 4 5 6 |
top - 18:06:10 up 149 days, 6:39, 3 users, load average: 322.56, 331.35, 225.97 Tasks: 2788 total, 2 running, 2776 sleeping, 1 stopped, 9 zombie %Cpu(s): 0.7 us, 4.4 sy, 0.0 ni, 6.3 id, 88.5 wa, 0.0 hi, 0.1 si, 0.0 st KiB Mem : 66059044 total, 635152 free, 53491180 used, 11932712 buff/cache KiB Swap: 8191996 total, 0 free, 8191996 used. 7739852 avail Mem |
dmesg大量如下报错:
[四 9月 8 19:24:24 2016] XFS: possible memory allocation deadlock in kmem_alloc (mode:0x250)
解决办法:
|
1 |
echo 1 > /proc/sys/vm/drop_caches |
效果不佳:
|
1 2 3 4 5 6 7 8 9 10 |
top - 18:12:59 up 149 days, 6:45, 4 users, load average: 211.63, 320.98, 266.11 Tasks: 2748 total, 2 running, 2741 sleeping, 1 stopped, 4 zombie %Cpu(s): 6.8 us, 15.2 sy, 0.0 ni, 9.2 id, 68.8 wa, 0.0 hi, 0.1 si, 0.0 st KiB Mem : 66059044 total, 2339032 free, 53697124 used, 10022888 buff/cache KiB Swap: 8191996 total, 0 free, 8191996 used. 7518744 avail Mem PID USER PR NI VIRT RES SHR S %CPU %MEM TIME+ COMMAND 6778 root 20 0 231840 11548 6740 R 66.9 0.0 63:20.26 php 103487 root 20 0 197984 18040 5444 S 27.2 0.0 1:08.14 python |
|
1 2 3 4 5 6 |
#iostat 5 -m sda avg-cpu: %user %nice %system %iowait %steal %idle 6.29 0.01 15.31 59.91 0.00 18.49 Device: tps MB_read/s MB_wrtn/s MB_read MB_wrtn sda 396.20 1.38 3.11 6 15 |