疑问
http代理时,域名解析发生在client端还是代理服务器端?
使用gcloud sdk时,发现域名是在本地解析的,由于是在内网,本地解析到的ip比较特殊,如此以来,即使设置代理也无法规避这个问题,目前我的解决办法就是设置host,当然,修改本地的dns也行,只是内网域名就无法解析了
先说结论吧:
分析
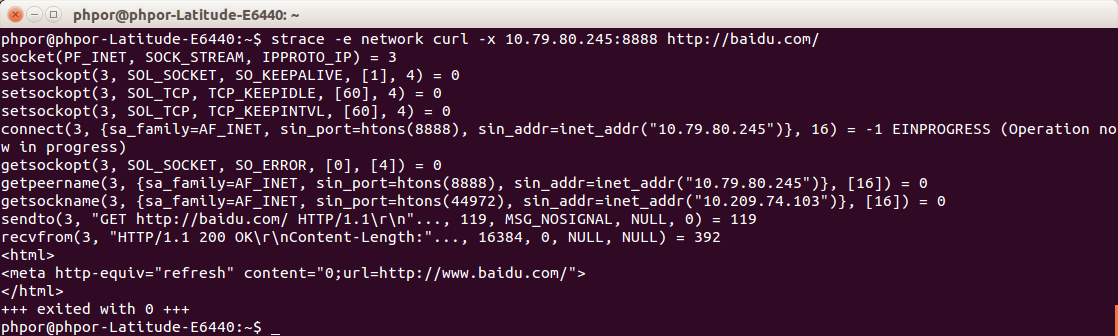
情形1:
- 不需要connect方法,显然(不显然吗)这种方式只支持http的情况,不支持https的情况
- 域名解析发生在代理服务器上
事实上,如果访问的是https的地址,自然会通过使用connect方法的方式实现
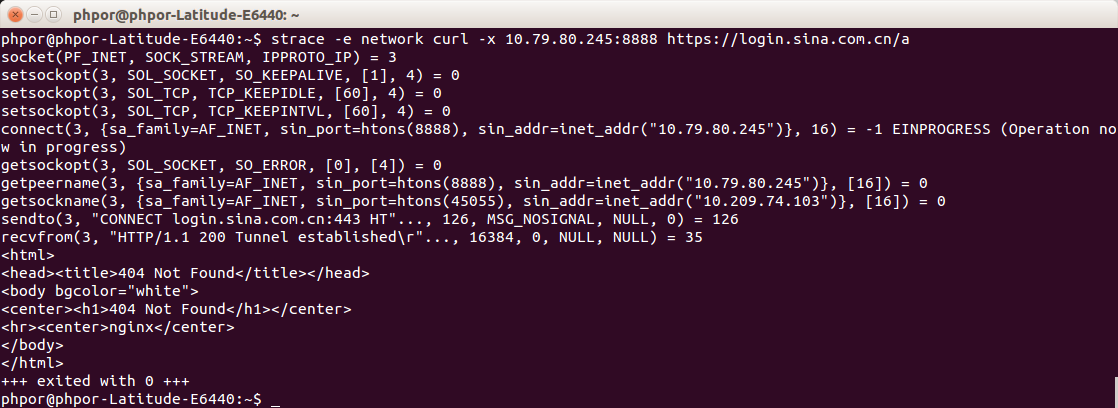
情形2:
- 使用connect方法 (通过给curl添加 -p 参数实现, 这应该是比较常见和通用的办法)
- 域名解析发生在代理服务器上

下面我们看看Golang中关于代理的实现,重点关注域名解析发生在了哪里:
golang代码:
1 2 3 4 5 6 7 8 9 10 11 12 13 14 15 16 17 18 19 20 21 22 23 24 25 26 27 |
package main import ( "fmt" "io/ioutil" "net" "net/http" "os" "time" ) func main() { get() } func get() { url := "http://baidu.com/" if len(os.Args) > 1 { url = os.Args[1] } res, err := http.Get(url) check_fail(err) defer res.Body.Close() body, err := ioutil.ReadAll(res.Body) check_fail(err) fmt.Println(string(body)) } |
通过环境变量设置代理:
|
|
export http_proxy=http://10.79.80.245:8888 export https_proxy=http://10.79.80.245:8888 |
http请求:
- 和curl实现一致
- 域名解析发生在代理服务器上

https请求:
- 和curl实现一致
- 域名解析发生在代理服务器端
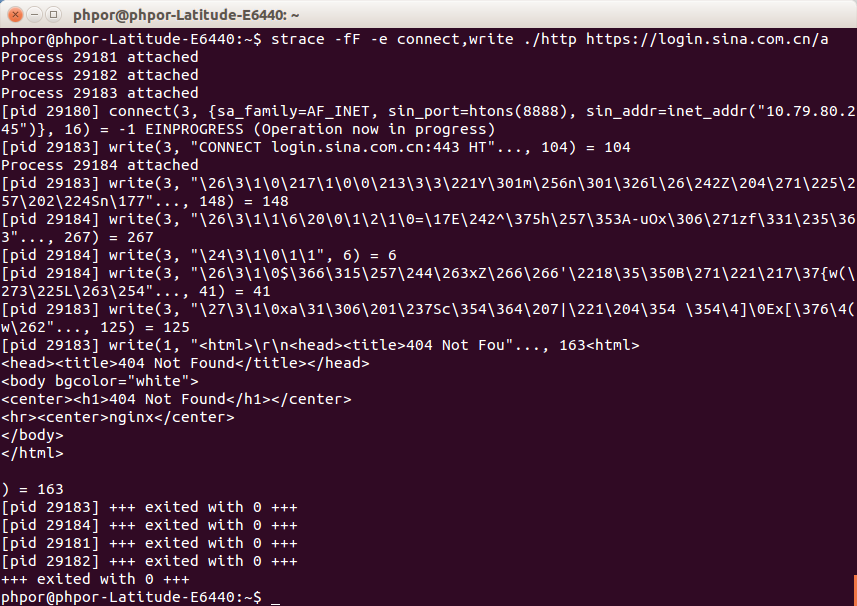
- 意外发现: golang关于https请求的实现中,代理的connect和后续的数据交互发生在不同的线程中(看pid就能知晓)
python中的实现
脚本: (这里的httplib2是gcloud sdk中的)
|
|
import httplib2 import sys url = "http://baidu.com/" if len(sys.argv) > 1: url = sys.argv[1] h = httplib2.Http() headers, body = h.request(url) print body |
Http请求:
- 即使是http请求,也默认使用connect方法
- 域名是在client端解析的
