产品: unity500
实物拍照:
前面板:

上面是一个扩展柜,下面是一个主机,都是2u的设备
后面板:

从后面来看,扩展柜比主机要短一截
(话说,这布线也够烂的)
其它:
- unity500就是最多支持500块儿盘,unity400就是最多支持400块儿盘
- 从前面板可以看到,每个扩展柜(或主机)支持2.5英寸盘25个,(具介绍,如果是3.5英寸盘类型的盘柜的话,可以插15个)
- unity的web管理界面常用到的功能是池子的创建、lun的创建等;
- 不满意的地方: 每个磁盘只能属于一个池子
DevOps
产品: unity500
实物拍照:
前面板:
上面是一个扩展柜,下面是一个主机,都是2u的设备
后面板:
从后面来看,扩展柜比主机要短一截
(话说,这布线也够烂的)
其它:
https://github.com/docker/docker-ce-packaging/tree/master/rpm
安装并启动docker就行:
|
1 |
yum install docker-ce |
|
1 2 3 4 |
git clone https://github.com/docker/docker-ce-packaging.git cd docker-ce-packaging git clone https://github.com/docker/docker-ce.git make ENGINE_DIR=$(pwd)/docker-ce/components/engine CLI_DIR=$(pwd)/docker-ce/components/cli rpm |
从make命令说起,通过docker容器对engine cli分别进行打包,通过git获取版本号信息,通过docker-ce-packaging/rpm/Dockerfile.x86_64 构建一个基于centos:7 的容器镜像,镜像中安装编译环境(golang),容器挂载外部的一些目录,即,输入来自于外部目录,编译结果输出到外部目录;容器镜像直接启动rpmbuild命令进行构建,构建的详细步骤都在rpm的spec文件中,构建过程中还需要下载有些其他的源码
部分细节:
rpmbuild 命令:
|
1 2 |
cd /root/rpmbuild rpmbuild -ba --define '_gitcommit ef0da45' --define '_release 0.0.dev.git20180315.033056.0.ef0da45' --define '_version 0.0.0' --define '_origversion 0.0.0-dev' --define '_experimental 0' SPECS/docker-ce.spec |
容器挂载的外部目录:
|
1 |
-v /data3/docker-ce-packaging/rpm/rpmbuild/SOURCES:/root/rpmbuild/SOURCES -v /data3/docker-ce-packaging/rpm/rpmbuild/BUILD:/root/rpmbuild/BUILD -v /data3/docker-ce-packaging/rpm/rpmbuild/BUILDROOT:/root/rpmbuild/BUILDROOT -v /data3/docker-ce-packaging/rpm/rpmbuild/RPMS:/root/rpmbuild/RPMS -v /data3/docker-ce-packaging/rpm/rpmbuild/SRPMS:/root/rpmbuild/SRPMS -v /data3/docker-ce-packaging/rpm/systemd:/systemd |
问题记录:
本人使用的owncloud版本号: 8.2.8
第一步:
使用admin账号在“管理”部分开启外部存储配置:
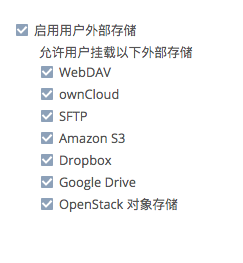
第二步:
在任意账号(也可以是管理员账号)配置外部存储:

注意:
问题:
|
1 |
openstack --os-project-name openstack-test object delete test . |
owncloud + openstack 对象存储的好处:
|
1 2 |
yum install davfs2 -y mount -t davfs http://pan.i.beebank.com/remote.php/webdav/sa-software/rpm-sources /data2/rpmbuild-sources |
参考:
语法说明
|
1 |
step choose firstn $n type bucket |
即: 选择 $n 个不同的bucket, 其中, $n = 0 意味着需要多少个副本就选择多少个bucket, $n = -1 意味着还需要选择多少副本就选择多少副本,返回结果是bucket,如果bucket 是osd自然就是叶子节点
|
1 |
step chooseleaf firstn $n type bucket |
即: 选择 $n 个不同的bucket,然后,再从每个bucket中任意选择一个osd,相当于:
|
1 2 |
step choose firstn $n type bucket step choose firstn 1 type osd |
这种情况下,显然chooseleaf比choose简单许多,表达的意思都是以bucket为故障域,在里面选择$n 个osd, 这也是比较常见的情况
情况二:
那么,如果我有多个row,但是期望将3份数据都存放在同一个row下,并且选择3个不同的rack存放呢?表达如下:
|
1 2 |
step choose firstn 1 type row step chooseleaf firstn 0 type rack |
等价于:
情况三:
假如我有5个row,但是仅仅希望存储的两个副本分别存放在row1和row2(我们知道,每个bucket都是有名字的),而不是随意选择两个,然后以rack为故障域来选择osd,该如何写呢?
这时候,仅仅使用choose和chooseleaf就搞不定了,还记得take语法吧,如下:
|
1 2 3 4 5 6 7 |
step take row1 step chooseleaf firstn 1 type rack step emit step take row2 step chooseleaf firstn -1 type rack step emit |
参考:
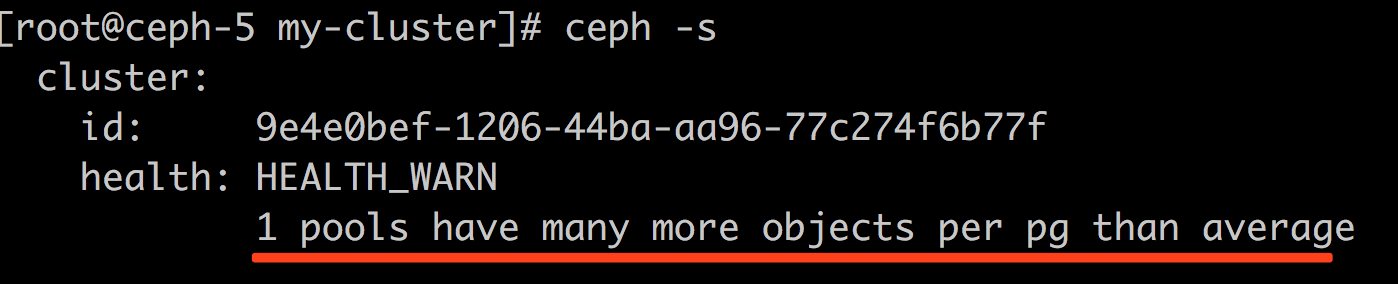
ceph中pg中对象数量大小超过集群平均值时会有报警,问题:

|
1 2 3 4 |
# ceph daemon osd.2 config set mon_pg_warn_max_object_skew 20 { "success": "mon_pg_warn_max_object_skew = '20.000000' (not observed, change may require restart) rocksdb_separate_wal_dir = 'false' (not observed, change may require restart) " } |
思考:
|
1 |
# ceph osd df |
mon_max_pg_per_osd option on the monitors. The older mon_pg_warn_max_per_osd option has been removed.
参考:
使用dd读取一个大文件时,速度可达 100MB+/s, 但是cat读取大文件时,速度才达到 30MB/s,为何?
由于ceph块儿设备是从网络上读取数据,读取数据的效率和网络的性能由于直接关系,同时也和每次读取的块儿的大小有直接关系:
|
1 2 3 4 5 |
# dd if=/data2/bigfile bs=100M count=20 iflag=direct |pv >/dev/null 记录了20+0 的读入 136MiB/s] [ <=> ] 记录了20+0 的写出 2097152000字节(2.1 GB)已复制,16.5394 秒,127 MB/秒 1.95GiB 0:00:16 [ 120MiB/s] |
在块儿大小为100MB的情况下,读取速度可达到 120MB/s
|
1 2 3 4 5 |
# dd if=/data2/bigfile bs=1M count=3000 iflag=direct |pv >/dev/null 记录了3000+0 的读入.2MiB/s] [ <=> ] 记录了3000+0 的写出 3145728000字节(3.1 GB)已复制,42.9703 秒,73.2 MB/秒 2.93GiB 0:00:42 [69.8MiB/s] |
在块儿大小为1MB的情况下,读取速度可达到 70MB/s
|
1 2 3 4 5 |
# dd if=/data2/bigfile bs=64K count=3000 iflag=direct |pv >/dev/null 记录了3000+0 的读入.8MiB/s] [ <=> ] 记录了3000+0 的写出 196608000字节(197 MB)已复制,6.63725 秒,29.6 MB/秒 187MiB 0:00:06 [28.2MiB/s] |
在块儿大小为64KB的情况下,读取速度可达到 30MB/s; ,然而cat命令每次read的大小正好是64KB
针对这种情况,如果本机有较大内存的话,不妨先通过dd大块儿的方法使得文件被cache起来,然后再做其它类似cat的操作;
另外: 增加IO大小,到达底层之后,会变成多个IO请求,相当于底层同时又多个IO请求,实际上是相当于增加了队列深度。
|
1 2 |
# ceph osd erasure-code-profile ls default |
|
1 2 3 4 5 |
# ceph osd erasure-code-profile get default k=2 m=1 plugin=jerasure technique=reed_sol_van |
|
1 |
# ceph osd erasure-code-profile set hdd-3-2 k=3 m=2 crush-device-class=hdd |
default].host].lrc plugin, l): these determine the number of erasure code shards, affecting the resulting CRUSH rule.|
1 2 |
# ceph osd crush rule create-erasure erasure_hdd hdd-3-2 created rule erasure_hdd at 5 |
|
1 2 3 4 5 6 7 8 9 10 11 12 13 14 15 16 17 18 19 20 21 22 23 24 25 26 27 28 29 30 31 32 |
# ceph osd crush rule dump erasure_hdd { "rule_id": 5, "rule_name": "erasure_hdd", "ruleset": 5, "type": 3, "min_size": 3, "max_size": 5, "steps": [ { "op": "set_chooseleaf_tries", "num": 5 }, { "op": "set_choose_tries", "num": 100 }, { "op": "take", "item": -2, "item_name": "default~hdd" }, { "op": "chooseleaf_indep", "num": 0, "type": "host" }, { "op": "emit" } ] } |
|
1 2 |
# ceph osd pool create test-bigdata 256 256 erasure hdd-3-2 erasure_hdd pool 'test-bigdata' created |
|
1 2 |
# ceph osd pool set test-bigdata fast_read 1 set pool 24 fast_read to 1 |
|
1 2 |
# ceph osd pool set test-bigdata allow_ec_overwrites true set pool 24 allow_ec_overwrites to true |
|
1 2 3 4 5 6 7 8 9 10 11 |
# ceph osd pool create test-bigdata-cache-tier 128 pool 'test-bigdata-cache-tier' created # ceph osd tier add test-bigdata test-bigdata-cache-tier pool 'test-bigdata-cache-tier' is now (or already was) a tier of 'test-bigdata' # ceph osd tier cache-modetest-bigdata-cache-tier writeback set cache-mode for pool 'test-bigdata-cache-tier' to writeback # ceph osd tier set-overlay test-bigdata test-bigdata-cache-tier overlay for 'test-bigdata' is now (or already was) 'test-bigdata-cache-tier' |
|
1 2 3 4 5 |
# ceph osd pool set test-bigdata-cache-tier hit_set_count 1 set pool 29 hit_set_count to 1 # ceph osd pool set test-bigdata-cache-tier hit_set_type bloom set pool 29 hit_set_type to bloom |
参考:
实战中的问题:

|
1 |
ceph osd pool ls detail|grep cache_mode |
当vsftpd在容器里面,而且容器IP又是host内部的私有IP的情况,client采用passive模式来下载数据能行得通吗? 可以的
每个kvm虚拟机进程,如果挂载N个rbd设备,则会有N个 fn-radosclient 线程,每个fn-radosclient 线程针对特定的osd只有一个connection; 如此,一个rbd设备上的某块儿数据如果落在了相同的osd上,(猜测rados协议不会再同一个连接上同时做多个事务),则意味着不可能并行写入,于是乎,特别是对于随机读写,网络延迟对存储效率有着直接的影响,即使虚拟机内部多线程也无济于事,因为kvm进程中的fn-radosclient 只有一个
|
1 2 |
# top -p 2795 -b -n 1 -H|grep rados 2816 qemu 20 0 5259308 3.403g 7356 S 0.0 3.6 15:01.80 fn-radosclient |